At what point did you decide to use ZBrush in the production and why?
GEOFF CAMPBELL: We knew we were going to use ZBrush early on for much of the displacement but as I mentioned earlier, the maquette phase that we didn't plan for made the greatest impact in keeping us on schedule. Our first round of characters was taking a fair amount of time so we were looking for a way to get things on track. Using ZBrush to quickly sculpt and texture maquettes for a basic client buy off on model proportions was the missing ingredient. It's ironic that by fitting in three days of previously unscheduled work, we actually trimmed weeks off our schedule but those three days of ZBrushing meant the client knew what they were getting up front and the modeler could then concentrate on fleshing out the finished character.
How was ZBrush used?
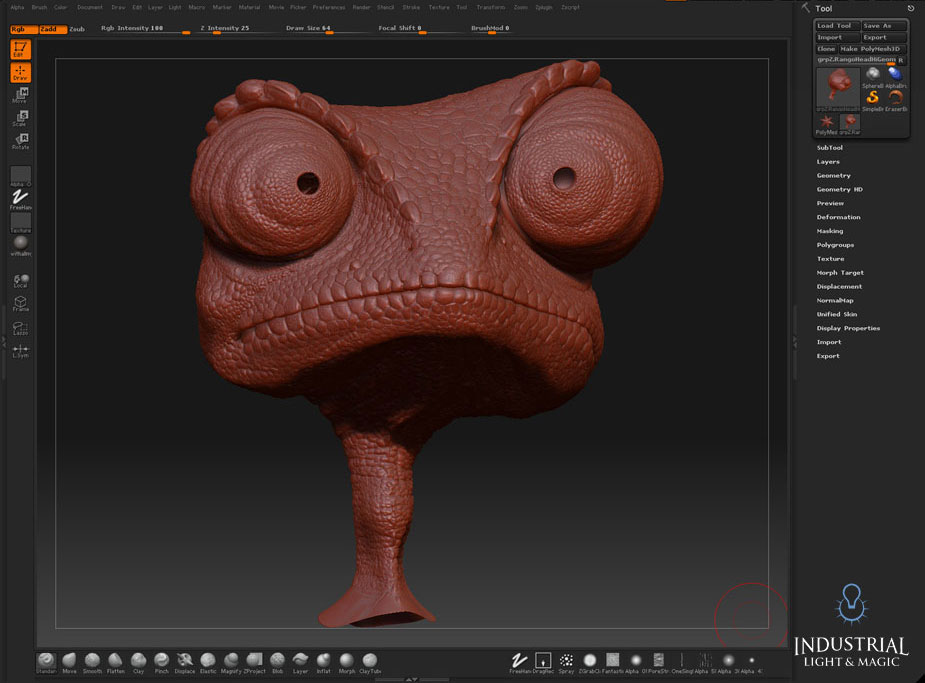
FRANK GRAVATT: As a sculpture, Rango was a little bit different from other sculpts I'd done before. For one, his symmetry ended at his clavicle. His head and crooked neck would be completely sculpted on; no symmetrical sculpting here. The extremeness of his asymmetry really added to his wonderfully weird look and quirky personality. I think the real challenge of the sculpt was capturing the wackiness of Crash McCreery's 2D illustrations in a three dimensional model. Each piece of art he had done of Rango had its own individual bit of awesome craziness to it. Bringing the looks together into one character that our team, Gore Verbinski and Crash would agree on was quite the task to model. And this is before any ZBrush work was done.
Once the model was approved I then had to figure out what type of scales to put on him. As I learned there are as many varieties of scales and patterns as you can imagine. Ultimately, Crash provided the art for these patterns, which fit the character so well. Zany scales, who would have thought! With the design of Rango's scales established, the next area to solve was how to apply them seamlessly across different ZTool files: arms to torso, torso to neck, etc. The solution was to bring .obj bridges of the body into ZBrush. I'd clean up the gap with scales on the bridge and then re-project this work back to the separate SubTools.
How many artists worked on the characters? How many of them used ZBrush?
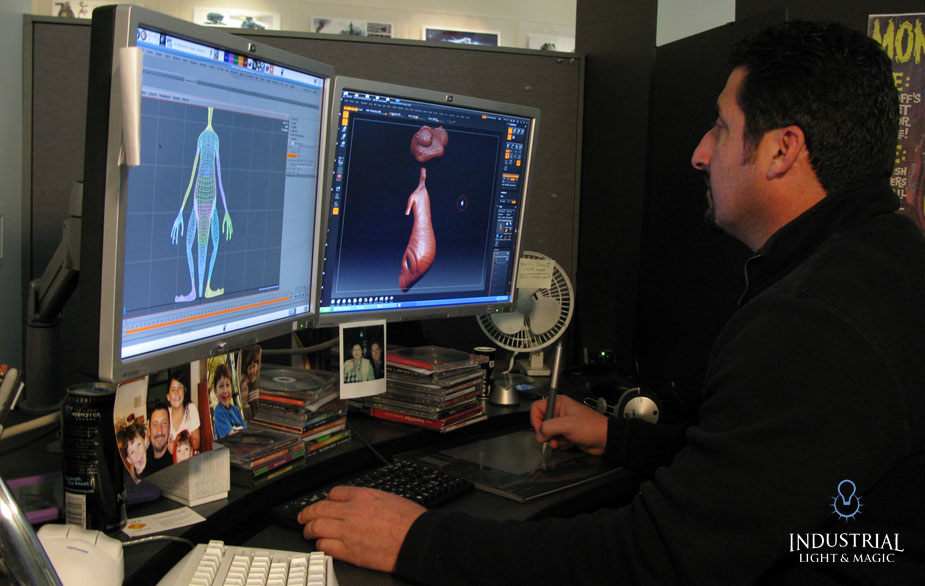
GEOFF CAMPBELL: We had about fifteen modelers and a dozen texture artists working on characters and each modeler doing their own ZBrush maquettes. About thirty main characters went through the maquette phase.
Does ILM have any dedicated ZBrush artists on staff? How important is it to you for an artist to have ZBrush skill?
GEOFF CAMPBELL: It was important that all our modelers take advantage of the best tools out there for working quickly and efficiently when sculpting rapid prototypes and maquettes. In that sense we're all dedicated ZBrush artists but our pipeline requires a lot of proprietary, artistic and technical skills as well.
Which version of ZBrush was used for Rango?
We were using both versions 3.5 and 4.0.
Was ZBrush used for environmental assets? If so, what role did it play?
RYAN CALLOWAY: Yes! Using different tools and techniques in ZBrush we were able to sculpt sharp, realistic rock features. We could easily create anything from large scale, chunky features to subtle surface details. All of this would then get written out to displacement maps and applied to the models.
Artists would share tools back and forth. If one of us made a new alpha in ZBrush or found a new brush and settings that worked well for rock details, we'd call each other up and say, "Hey, I just made a brush that's perfect! I'll send it to you." What worked best was creating a generic, rock alpha from sculpting on a simple plane and using the Standard brush with DragRect stroke to stamp that alpha (or a few good, generic ones) all over the model. The crevices and open faces of rock were really the selling points. Turns out that's where all the juicy details live!
For one sequence in particular, there were these rock mounds that, without displacement, just looked like piles of melted ice cream. There was a lot of back and forth with Crash and Gore, partly because there wasn't a clear direction as to what exactly the rock was supposed to look like. Rock is incredibly more complex than I'd ever thought! That's where ZBrush came into play - we brought in the base mesh and quickly cut in details and broke up the silhouette. At that point we were really using ZBrush as a design tool.
What is your favorite ZBrush feature?
RYAN CALLOWAY: My favorite thing about ZBrush is the user interface - it takes a little getting used to but that's been my experience with all 3D programs. Once you get comfortable with the ZBrush interface, it's really convenient. If I'm sculpting away at a model I don't want to have to dig through menus and windows for the tools or buttons I need. Pixologic made everything very readily available and even customizable. It's like when I'm working on a clay sculpture and have all of my tools laid out on the table in front of me - when I want a new one I just pick it up and use it. Simple.
KRIS COSTA: My current favorite feature in ZBrush is the HD geometry. The amount of detail I can put on my models is impressive and the ability to export displacement maps that can be rendered showing all this fine detail is essential when creating very complex creatures, without the need to split my model into multiple SubTools.
GEOFF CAMPBELL: I love the brushes, especially the Clay and Trim Dynamic brushes. The Clip tools are also a lot of fun for hard surface models.
FRANK GRAVATT: Favorite tool... is still Project All.
GIO NAKPIL: My favorite tool is TransPose.
)
)