Pixologic interview with Luma Pictures
Payam Shohadai - VFX SUP
Hello Payam. You were the VFX Supervisor for Underworld:Evolution, which is Luma Pictures largest picture to date. Can you describe some of the challenges you faced working on a picture of this size and scale?
One challenge was securing the project, since typically the largest VFX facilities are the only ones considered for work of this magnitude. However, since we had a prior working relationship with the production studio, and since we were their chosen VFX facility for another one of their creature films, we were ultimately able to convince them and the director to award Luma the lead position on Underworld:Evolution. At that point we essentially cherry picked the VFX shots we wanted to work on. Of course we selected every CG creature, CG wing, creature transformation, and CG set/environment shot in the film, which was a good and bad thing. On the positive side, we ended up with about 200 killer, CG heavy VFX shots for our reel. On the negative side, all of those assets were our responsibility. This was an undertaking we were very well prepared for when the film had less than half the number of shots. However, over the course of the first half of the project, after we were deep into the countless assets (including the 13 different creature types and the CG fortress environment), the shot count more than doubled. CG assets of this complexity are not ones that can easily be handed off for another facility to take over, so we had to quickly gear up to take on double the work that we initially intended to do. In the end, that amounted to an addition of only about 10 project hires to our core staff, but it did result in hard work and long hours for the dreaded crunch period of the film - something we usually work hard to avoid.
"ZBrush has been a major part of our pipeline for almost two years now, while many other facilities are just starting to consider its usage. Because of our early adoption of ZBrush we now have a major competitive edge in creating highly detailed models."
What advantages do you think being a smaller company gave you both in terms of your people and your facility?
A significant advantage that I feel we have over larger studios is our ability to be very nimble. This gives us an edge in many ways, especially when it comes to hiring trends, pipeline development, and our choice of hardware/software tools. We frequently hear from even the veterans of the large studio circuit about how top notch our pipeline is. In addition to that, we get to employ bleeding edge tools without hassle. A perfect example is our usage of ZBrush. ZBrush has been a major part of our pipeline for almost two years now, while many other facilities are just starting to consider its usage. Because of our early adoption of ZBrush we now have a major competitive edge in creating highly detailed models. Of course, our artists have a lot to do with how great the artwork looks. As we always say, everyone can use a pencil, but not everyone can draw.
Many of your artists are multi-faceted. Do you see this as a trend in CG for artists to be moving away from just one discipline?
I certainly think that becoming familiar with multiple aspects of CG will make an artist better at their primary, chosen craft. And come to think of it, it is more common nowadays that we receive applications from multi-faceted artists.
What do you look for when evaluating an artist to work in your company?
We tend to maintain staff, as opposed to continually growing and shrinking heavily per project. So, we look for the elusive jack-of-all-trades-master-of-ONE types. It isn't enough for an artist to be multi-faceted, without excelling at a given skill, because we expect a high standard of quality from the artwork being completed by our staff. In addition to that, we prefer artists to be somewhat self-reliant and proactive, which allows us to keep middle management to a minimum. This in turn allows for regular, direct communication between the artist creating the work and the supervisor approving the work.
What drives you and your artists to put so many crazy hours into a project for the glory of a few hours in celluloid?
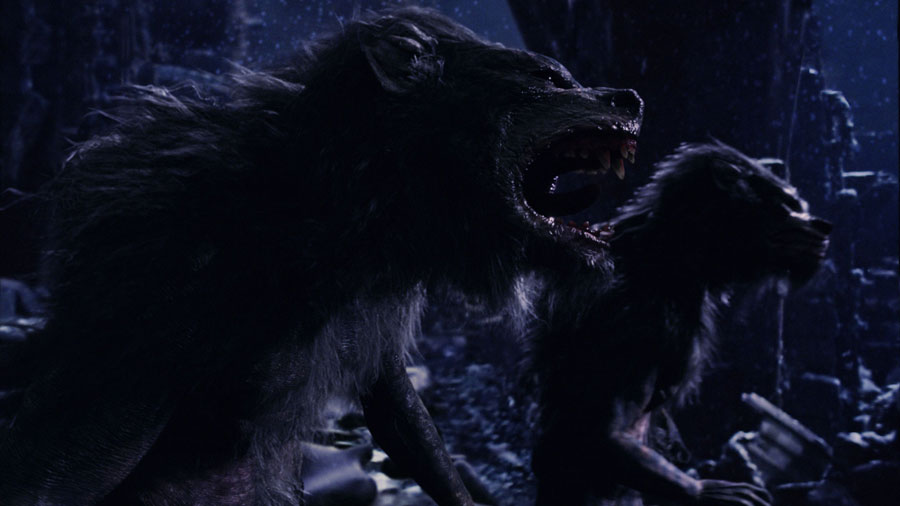
As hellish as the industry can get at times, this is an incredibly cool profession - it is the true movie magic. I mean, hell, King Kong has a scene in which a giant ape is beating the hell out of a dinosaur, while falling through a ravine, while getting tangled up in the many vines on the way down! How cool is that! The level of interaction that can be achieved between CG and live action is amazing, and makes for such surreal scenes in films these days. In Underworld:Evolution for example, we had so much fun creating CG Werewolves tackling a rider on a horse, across multiple cuts, from multiple angles. It may be extremely time consuming and painful, but we now can create amazing scenes like that, and imagination is the only limit. If you think about it, we are either re-creating reality in some scenarios, or creating reality for things that don't exist in other scenarios. For me, I feel that knowing this much about CG has heightened my senses - as weird as that may seem. In the few moments that I do get to spend away from the computer, and in the real world, everything I look at is interesting, because my brain is always defaulting to figuring out how to create that thing I'm looking at. You're always noticing the textural details and how light interacts with the surface of various things. There are even many times when you look at something in the real world and marvel at the fact that if it was created in CG, it would look wrong. Non-industry people don't really understand how it works, and just marvel at what is accomplished. Sometimes when I step back from the work we create, even I still marvel at what can be accomplished.

What is next for Luma Pictures?
Luma's recent work on Underworld:Evolution has put us in a great position. We're now invited to bid on very high profile films for most of the major film studios, so the future is bound to be really exciting.
Steven Swanson - VFX Producer
Hello Steve. I will ask the same question I asked Payam. Many of your artists are multi-faceted. Do you see this as a trend in CG for artists to be moving away from just one discipline?
Jack-of-all–trades-master-of-ONE is a good formula. Coordinating with fewer people is more efficient than chasing down various people in different locations. A compositor who lights and renders his own passes inherently knows when new lighting passes are available. Artists who understand both modeling and texturing are well suited for creating displacement maps since both skills are necessary. These are obvious skill pairings but any artist who has a solid foundation in multiple facets of visual effects can better communicate technically and know how to "traverse the pipe" to identify where an issue should be fixed. Having said that, specialists who truly excel in one area are extremely valuable. These people tend to be faster and make fewer mistakes than generalists. There is a place for both and knowing how to capitalize on each artist's strengths depends on schedule and scope of work.
Luma is a completely Mac-based house. Can you talk about how that has helped you and what advantages you see in going completely Mac?
All standard industry applications are available for Mac. UNIX stability means fewer client crashes. We have artists who have learned to program and create tools using UNIX, MYSQL, PHP, Applescript, and C. These tools allow Shake, Maya, Mental Ray and Rush to interface with each other. Systems administration is easier. We have two Sys Ads supporting a staff of 50+.
Vincent Cirelli - CG SUP
Vince, lets talk about Software and your pipeline. Can you give me a brief sketch of your pipeline and how assets move from concept to final render?
We begin production by gathering as much reference as possible, this includes on-set photography, stock footage, production maquettes, etc. This part of the pipeline is one of the most important. When creating a creature asset, we discuss the range of motion, anatomy, and kinematics that the character must have. Base cage modeling begins in Maya after a skeleton has been created. We then bring the cage into ZBrush and start to really define the character. ZBrush allows model development to happen in parallel with rigging and animation. In addition, ZBrush has blurred the line between texturing and modeling. While the form is being sculpted the textures are being painted all in one app. This is extremely helpful in that we no longer need to wait for a modeling change, layout the UVs again, rebind and then wait to see an updated render. The feedback is incredibly fast. All the magic happens at render time through displacement in Mental Ray.
What lead to your interest in ZBrush?
Using ZBrush an artist can create an astounding amount of detail. I don't think this was easily achieved before the release of ZBrush. The choice to move to a ZBrush centric pipeline was a no-brainer.
What assets did you use ZBrush for?
We created all of the creatures that you see in UW2 using ZBrush. We also used ZBrush to create the entire fortress.
What would you say is ZBrush’s greatest contribution to your pipeline?
Once we lock down a base cage, ZBrush affords us the ability to refine a character very quickly and see the results immediately without the need for the mesh to go back to the beginning of the pipeline.
You also wrote your own tool to help you create the transformation. Please tell us a little more about this.
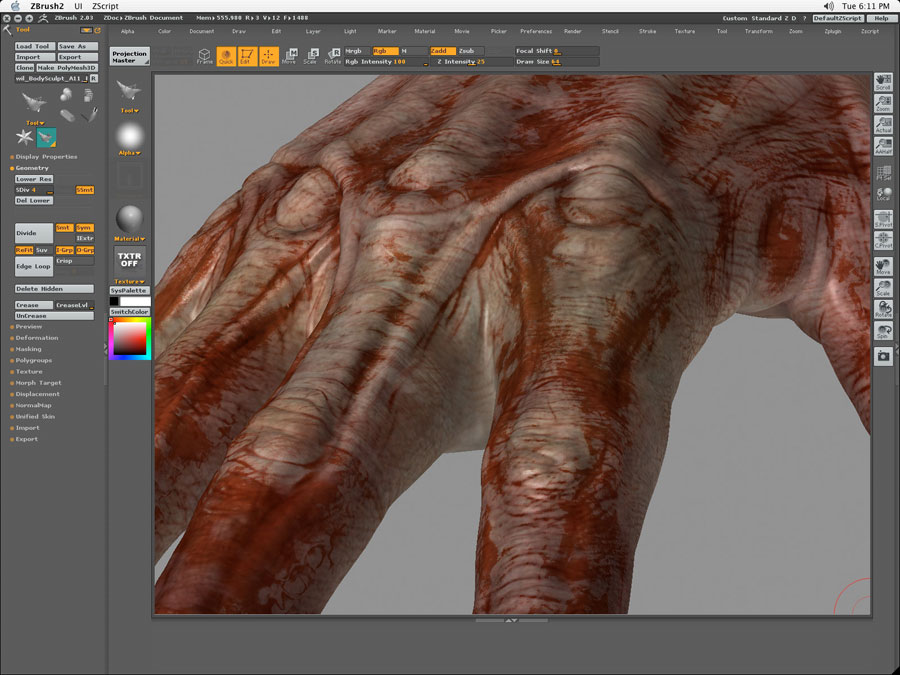
At the beginning of production, we experimented with different techniques that would allow us to push the characters range of motion and skin deformation beyond most CG creatures. Using ZBrush, we painted displacements to simulate muscle flexing, tendon bulging and skin wrinkling for each muscle group. These maps were separated into color and displacement. Once this was done, we needed a way to trigger and blend between specific displacements and surface textures based on how the creature was animated. For this, we developed a system of animating and blending localized displacement maps using a custom shader. The shader evaluates where and what has translated or rotated on the rig. It then sends this information to the blender which determines how much of each displacement to use and where to use it. Therefore, when the werewolf rolls his shoulders, muscles flex, tendons bulge, and veins become visible on the surface of the skin.
Any tips for studios looking to implement ZBrush into their pipeline?
Don't hesitate, do it now.
Pavel Pranevsky - Lead TD
Pavel, as the Lead TD at Luma can you tell us what role ZBrush plays in your pipeline?
Nearly all our assets receive a ZBrush treatment at some point in our pipeline. Textures, bump maps, displacement and normal maps are all generated with the help of ZBrush. So, in that sense, the "ZBrush pass" is an integral step in our production.
"The choice to move to a ZBrush centric pipeline
was a no-brainer."
There has been some talk about using displacements with ambient occlusion passes. How does Mental Ray handle these for you guys?
Mental Ray is a robust ray tracer that is highly customizable, which allowed us to set up a multitude of tools and shaders to accommodate our ZBrush displacement pipeline. Having these custom tools at our hands made rendering ambient occlusion with displacement a super trivial task. We were quickly able to get high quality, predictable results, without any flicker or displacement "popping" that you may experience with some other rendering solutions.
Ben Neall - Creature Modeler/Texturer
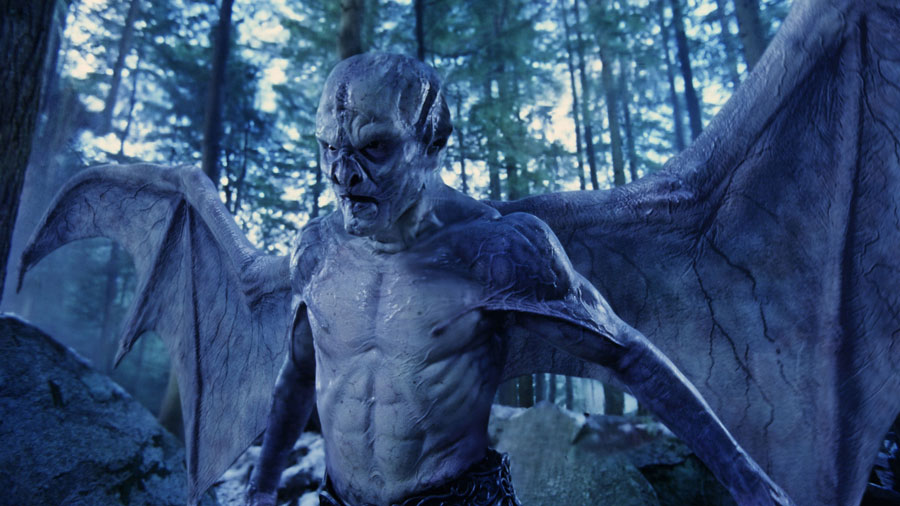
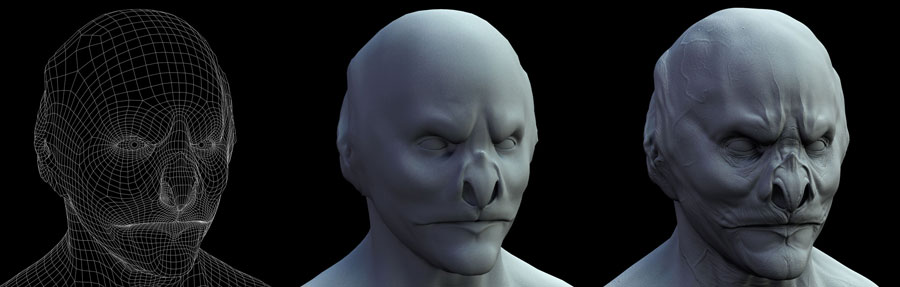
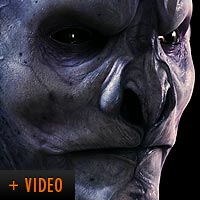
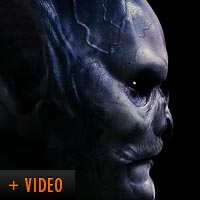
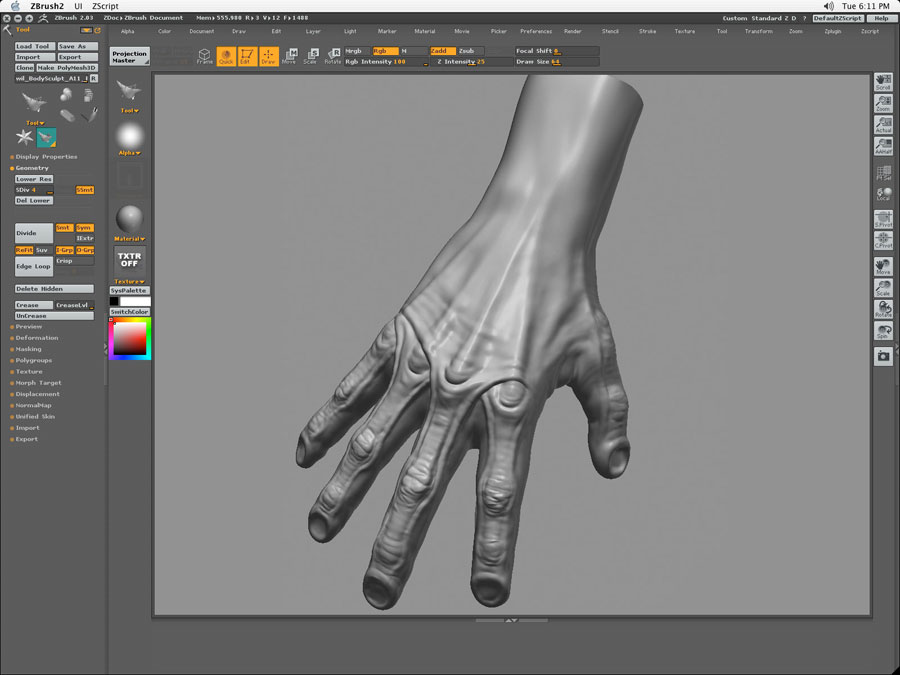
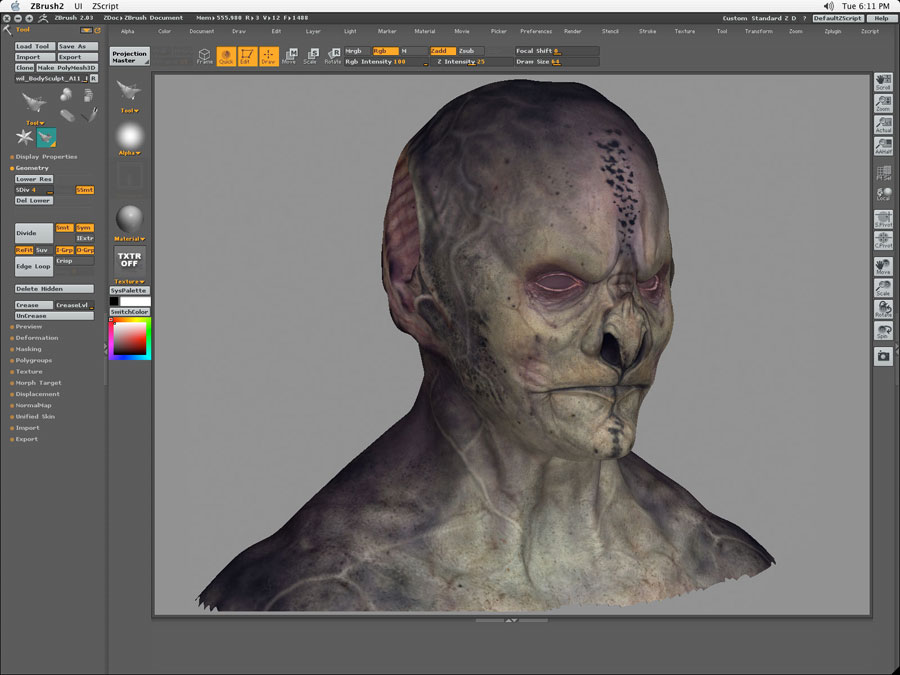
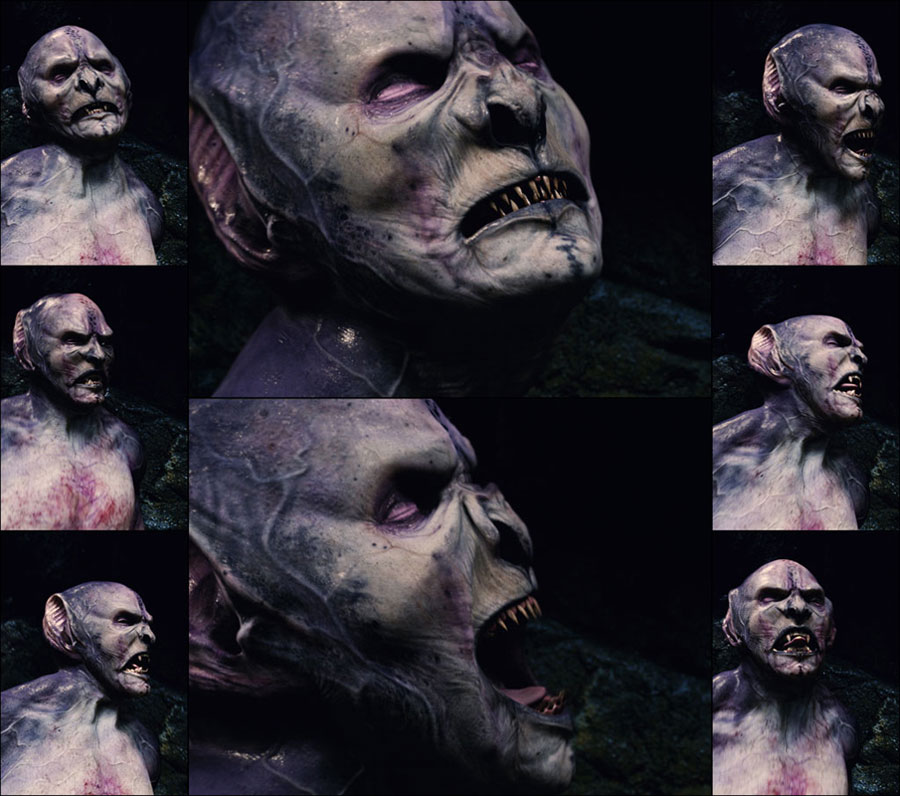
Ben, the digital Marcus was your model, right? Can you briefly sketch the workflow for creating Marcus in ZBrush?
All full character models in our pipeline were repurposed from the original werewolf model. This was the case due to the late introduction of Marcus's CG transform shot and the transform workflow in general. I started with a generic human cage configuration that our lead modeler (Cajun Hylton) had built from the original wolf mesh. We then reconstructed the edge-loops in Maya to best accommodate Marcus' anatomy. From there, the mesh was subdivided and sculpted in ZBrush to match the suit as much as possible. We realized quickly that the standard UV layout we were using would not accommodate the asset's distance to the camera, so I rebuilt the UVs to a head centric layout. Using this layout, I painted the textures for Marcus in ZBrush. No image projections were used for Marcus, in fact, Marcus has 100% hand painted texture maps, all done using ZBrush's texture painting tools. Additionally, all maps for Marcus were done at an 8k resolution.
What tools did you use? What were some of the most useful aspect of ZBrush for creating this?
The standard sculpting tools for polymeshes were used for creating meshes and displacements. However, our texturing pipeline for characters was redefined by ZBrush. The textures for characters on this show were on the most part, hand painted, as the reference supplied for our cg characters did not accommodate the resolutions we were working at (i.e., full 2k close ups). Specifically, the combination of our alpha libraries and ZBrush's projection painting tools aided us in creating photo-real creatures with zero scan data.
"I painted the textures for Marcus in ZBrush. No image projections were used for Marcus, in fact, Marcus has 100% hand painted texture maps, all done using ZBrush's texture painting tools."
How many polys was Marcus? How many separate displacement maps did you break him up into?
I believe the head is roughly 8k to 10k large. The count for our whole mesh is about 30k. Our pipeline was a single Mesh/UV one, so every character consisted of a single displacement map. However, as I mentioned earlier, Marcus's UV was head centric, maximizing the displacement detail for that area. The human side of Marcus had a displacement map as well, and they were blended to create the transition from one model to the next.
Miguel Ortega - Creature Modeler/Texturer
Miguel, you also used ZBrush for the werewolf transformation sequence. Can you sketch this workflow for us? You started with a ZBrush human and then what steps did you take to get the werewolf? What tools did you use?
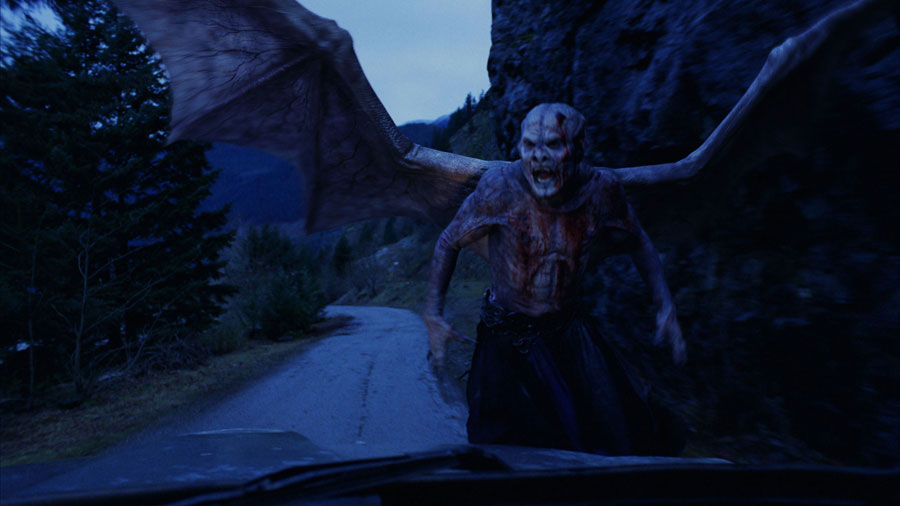
Actually we started with the werewolf model, which obviously has an extremely different anatomical build that that of a human, especially the legs and face. We made sure we had the correct amount of loops to go between all the different creatures. So once the "master" topology was defined I passed the model on to the modeling team who could start working on other creatures simultaneously with the werewolf.. As long as the vertex order wasn’t changed we could, in theory, have all four modelers working on different characters using the same topology before any of the models were finalized. Every character in Underworld Evolutions with the exception of the wings uses the same master topology.. This meant once the character was rigged, it was rigged for all characters, and could be morphed between any creature. ZBrush’s Move tool allowed us to quickly change major forms quickly, without the pain of vert by vert editing.
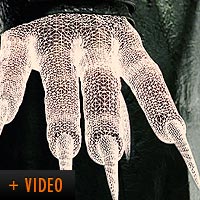
ZBrush was also used for Marcus’ wings when using a live action actor. Can you briefly sketch the workflow used to create them?
We did alot of R&D to get the right topology. Maybe 8-10 different versions. Once that was done we were able to bring this low poly mesh into ZBrush where it was "Sculpted" and all the textures were done using projection master, at the time of the production we didn’t have ZApp Link so everything you see is done by using the default brush tools in Projection Master. Also using some of the great concept texture work done by Luma artists Wendy Klein and Tim Matney.
"ZBrush saved us a huge amount of effort, turning
map development time from 3-4 days per tower
to less than a day."
Marcus’ wings were animated using blend shapes as opposed to a cloth simulation, right? What was the process for taking a ZBrush model, building the blend shapes and piping those to Maya?
The base wing topology was extremely low polygon almost a game level model, this meant that any blendshapes that needed to be done to the wings were done at a level 1 mesh which was so low poly that it was not such a terrible task as it would have been by traditional standards. The only thing in the actual topology is the minimum we needed to get it to deform correctly with the displacements on top defining all the Muscles, bone structure and details.
Chris Sage - Texture supeervisor
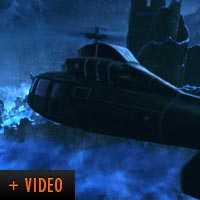
Chris. You are the Texture Supervisor at Luma. Let’s talk about the fortress! That is one amazing piece of work. Can you sketch the workflow used to create this and the ZBrush plug-ins and tools you used to create an absolutely amazing level of detail?
Working from sketches provided by the production designer and reference material we complied on our own, we started the process of creating a rough layout model. When the layout was approved, we started by developing a few hero sections of the model that would be the basis for both the look and the technique of the rest of the fortress. We made a decision at this stage to create all of the major in's and out's of the model with relatively low-res geometry and to handle the finer details with displacement to be done in ZBrush. Because the shots were still in development and the camera angles were a bit up in the air, this method allowed us the flexibility to control our level of detail with a combination of multiple resolution displacement maps and Mental Ray's displacement approximation capabilities.
During the look development for the hero towers, we made the decision to lay out the UV's is such a way that we were able to get the highest detail and map resolution along the edges of the geometry that needed to be decayed or broken. When we finished building the hero geometry, we started the finish texture work by creating a base stone texture and applying it across all of the geometry as a 3D projection so that we could achieve a uniform stone scale no matter how the UV's needed to be laid out for each tower. This projection was then baked out to UV textures from within Maya and used as a template to build the displacement and other maps.
We used a combination of ZBrush and Photoshop to refine the color, bump, spec and displacement maps to achieve the weathering and level of decay that was required for making the fortress look over 800 years old. Add to that, the fact that it was up in the mountains and snowing, and you have a real challenge. We were able to paint in the snow accumulation and other fine details on top of the displaced geometry in ZBrush and this saved us a huge amount of effort, turning map development time from 3-4 days per tower to less than a day.
During this entire process, we worked closely with the Lighter/TD in order to come up with a strategy to render this massive complex of displaced models. In total, there was over 120 walls, towers and abutments, all of which had displacement maps. The base geometry ended up being over 700k polys without displacement. So, you can imagine what a daunting task it was to get this to render. The final rendering solution required us to create our own, sophisticated layered rendering system that would calculate groups of geometry then write out information such as shadows and occlusion to individual pass files and then recompose the data as if it were all rendered together. In lighting the shots, we used a combination of FinalGather and standard key/fill lighting in order to achieve the look we wanted. This presented its own challenges because of the massive amount of displaced geometry. Again the solution lied in writing a set of tools to handle generating a FinalGather solution across a render farm that could be progressively improved as the development of the shots progressed.
In effect, every test render could be used to build FinalGather point data so when the time came to run the full displaced final geometry through the pipeline we already had a good portion of the lighting solution written out. The end result you see in the film is the product of over 6 million polygons, 600 different rendered component passes, over 65000 individual frames, 4TB of file storage and almost 2 minutes of actual screen time, none of which would have been possible without ZBrush and the talented artists behind the tools.